
스프링 시큐리티
스프링 시큐리티(Spring Security)는 스프링 기반의 애플리케이션에서 인증과 권한 부여를 담당하는 프레임워크입니다. 스프링 시큐리티를 사용하면 다양한 인증 방식을 적용하여 보안성을 높일 수 있으며, 세밀한 권한 제어를 통해 안전한 웹 애플리케이션을 개발할 수 있습니다. 스프링 시큐리티는 스프링 프레임워크와 연동하여 사용할 수 있으며, 다양한 인증 방식과 권한 제어 기능을 제공합니다.
스프링 시큐리티는 매우 강력하고 유연한 보안 프레임워크로, 스프링 기반의 웹 애플리케이션에서는 필수적인 기술입니다. 스프링 시큐리티를 이용하여 간단하게 인증 및 권한 부여 기능을 구현할 수 있으며, 필요에 따라 세부적인 설정을 통해 보다 정교한 보안 기능을 구현할 수 있습니다.
스프링 시큐리티는 다양한 보안 기능을 제공하는데, 예를 들어 사용자 인증, 권한 부여, 보안 설정, 안전한 코딩 지침 등이 있습니다. 스프링 시큐리티를 이용하면 웹 애플리케이션에서 발생할 수 있는 다양한 보안 위협에 대해 예방하고 대응할 수 있으며, 이를 통해 안전한 웹 애플리케이션을 개발할 수 있습니다.
스프링부트에서 스프링 시큐리티를 사용하려면, 먼저 spring-boot-starter-security 의존성을 추가해야 합니다.
implementation 'org.springframework.boot:spring-boot-starter-security'그리고 보안 설정을 위한 클래스를 작성하여 원하는 설정을 구현할 수 있습니다.
@Configuration
public class SecurityConfig {

    @Autowired
    private PrincipalDetailService principalDetailService;

    @Bean
    public BCryptPasswordEncoder encodePWD(){
        return new BCryptPasswordEncoder();
    }

    protected void configure(AuthenticationManagerBuilder auth) throws Exception{
        auth.userDetailsService(principalDetailService).passwordEncoder(encodePWD());
    }

    @Bean
    public SecurityFilterChain filterChain(HttpSecurity http) throws Exception{
        http.csrf().disable()

                .authorizeRequests()
                    .antMatchers("/", "/auth/**", "/js/**", "/css/**", "/image/**")
                    .permitAll()
                    .anyRequest()
                    .authenticated()

                .and()
                    .formLogin()
                    .loginPage("/auth/loginForm")
                    .loginProcessingUrl("/auth/loginProc")
                    .defaultSuccessUrl("/");

        return http.build();
}SecurityFilterChain을 사용하여 필요한 권한을 설정할 수 있습니다.
위의 예제는 모든 사용자가 "/", "/auth/**", "/js/**", "/css/**", "/image/**" 의 접근을 가능하게 하며 스프링 시큐리티 기반 login을 "/auth/loginForm" 경로에서 진행되게 합니다. 로그인 Form Action Url은 "/auth/loginProc" 경로가 됩니다.
스프링 시큐리티의 의존성을 추가하고 서버를 재시작하면 로그인 페이지에 진입합니다.
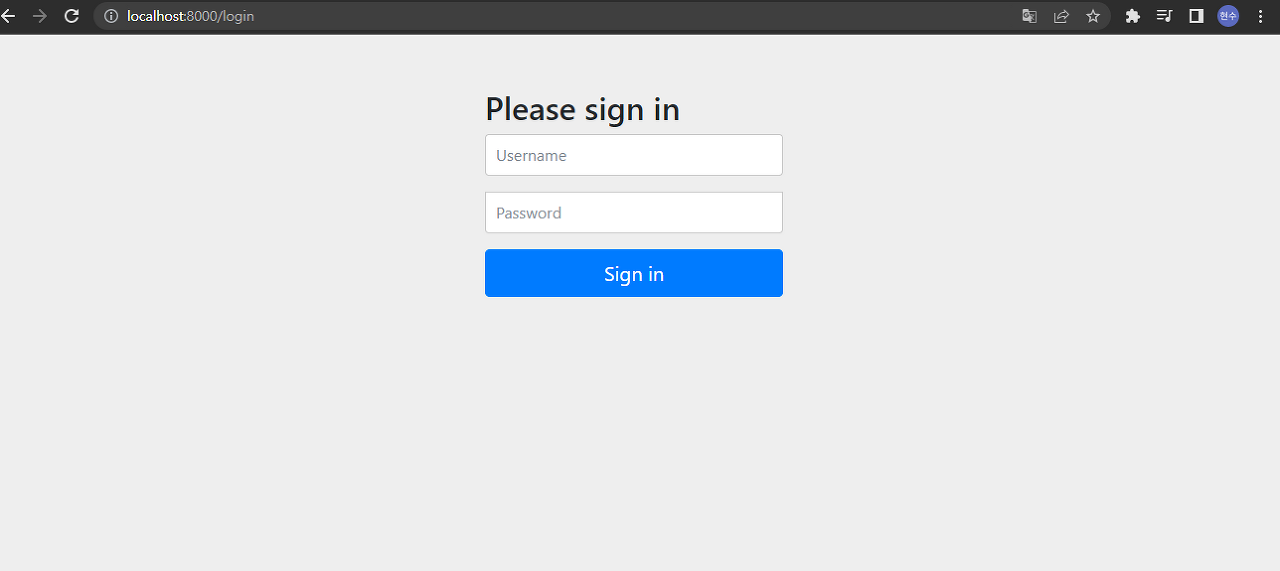
Username의 기본값은 user입니다. Password는 서버 콘솔창에서 확인할 수 있습니다.
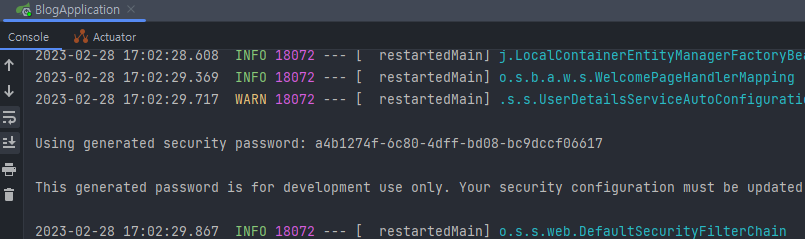
Using generated security password: a4b1274f-6c80-4dff-bd08-bc9dccf06617진입 시점부터 자동으로 session이 생성됩니다.
<html xmlns:th="http://www.thymeleaf.org"
      xmlns:sec="http://www.thymeleaf.org/extras/spring-security">

<div>
    <!--ROLE_USER 권한을 갖는다면 이 글이 보임-->
    <h1 sec:authorize="hasRole('ADMIN')">Has admin Role</h1>

    <!--ROLE_ADMIN 권한을 갖는다면 이 글이 보임-->
    <h1 sec:authorize="hasRole('USER')">Has user Role</h1>

    <div sec:authorize="isAuthenticated()">
        Only Authenticated user can see this Text
    </div>

    <!--인증시 사용된 객체에 대한 정보-->
    <b>Authenticated DTO:</b>
    <div sec:authentication="principal"></div>

    <!--인증시 사용된 객체의 Username (ID)-->
    <b>Authenticated username:</b>
    <div sec:authentication="name"></div>

    <!--객체의 권한-->
    <b>Authenticated user role:</b>
    <div sec:authentication="principal.authorities"></div>
</div>
이후 포스팅에서는 스프링시큐리티를 활용한 로그인 기능을 구현해보겠습니다.
Thymeleaf + Spring Security
Thymeleaf + Spring Security integration basics - Thymeleaf
Thymeleaf + Spring Security integration basics - Thymeleaf
Have you switched to Thymeleaf but your login and error pages are still using JSP? In this article we will see how to configure your Spring application to use Thymeleaf for login and error pages. All the code seen here comes from a working application. You
www.thymeleaf.org
'Spring' 카테고리의 다른 글
| [Spring Boot] JPA - MySql 연결 (0) | 2023.03.02 |
|---|---|
| [Spring Boot] ThymeLeaf 템플릿 사용 (0) | 2023.03.02 |
| [Spring Security] authorize가 인식 안되는 상황 (0) | 2023.03.02 |
| [Spring Boot] 스프링부트에서의 thymeleaf 사용방법 (1) | 2023.03.02 |
| [Srping Security] BCriptPasswordEncoder 해시 암호화 방법 (0) | 2023.03.02 |
스프링 시큐리티
스프링 시큐리티(Spring Security)는 스프링 기반의 애플리케이션에서 인증과 권한 부여를 담당하는 프레임워크입니다. 스프링 시큐리티를 사용하면 다양한 인증 방식을 적용하여 보안성을 높일 수 있으며, 세밀한 권한 제어를 통해 안전한 웹 애플리케이션을 개발할 수 있습니다. 스프링 시큐리티는 스프링 프레임워크와 연동하여 사용할 수 있으며, 다양한 인증 방식과 권한 제어 기능을 제공합니다.
스프링 시큐리티는 매우 강력하고 유연한 보안 프레임워크로, 스프링 기반의 웹 애플리케이션에서는 필수적인 기술입니다. 스프링 시큐리티를 이용하여 간단하게 인증 및 권한 부여 기능을 구현할 수 있으며, 필요에 따라 세부적인 설정을 통해 보다 정교한 보안 기능을 구현할 수 있습니다.
스프링 시큐리티는 다양한 보안 기능을 제공하는데, 예를 들어 사용자 인증, 권한 부여, 보안 설정, 안전한 코딩 지침 등이 있습니다. 스프링 시큐리티를 이용하면 웹 애플리케이션에서 발생할 수 있는 다양한 보안 위협에 대해 예방하고 대응할 수 있으며, 이를 통해 안전한 웹 애플리케이션을 개발할 수 있습니다.
스프링부트에서 스프링 시큐리티를 사용하려면, 먼저 spring-boot-starter-security 의존성을 추가해야 합니다.
implementation 'org.springframework.boot:spring-boot-starter-security'그리고 보안 설정을 위한 클래스를 작성하여 원하는 설정을 구현할 수 있습니다.
@Configuration
public class SecurityConfig {

    @Autowired
    private PrincipalDetailService principalDetailService;

    @Bean
    public BCryptPasswordEncoder encodePWD(){
        return new BCryptPasswordEncoder();
    }

    protected void configure(AuthenticationManagerBuilder auth) throws Exception{
        auth.userDetailsService(principalDetailService).passwordEncoder(encodePWD());
    }

    @Bean
    public SecurityFilterChain filterChain(HttpSecurity http) throws Exception{
        http.csrf().disable()

                .authorizeRequests()
                    .antMatchers("/", "/auth/**", "/js/**", "/css/**", "/image/**")
                    .permitAll()
                    .anyRequest()
                    .authenticated()

                .and()
                    .formLogin()
                    .loginPage("/auth/loginForm")
                    .loginProcessingUrl("/auth/loginProc")
                    .defaultSuccessUrl("/");

        return http.build();
}SecurityFilterChain을 사용하여 필요한 권한을 설정할 수 있습니다.
위의 예제는 모든 사용자가 "/", "/auth/**", "/js/**", "/css/**", "/image/**" 의 접근을 가능하게 하며 스프링 시큐리티 기반 login을 "/auth/loginForm" 경로에서 진행되게 합니다. 로그인 Form Action Url은 "/auth/loginProc" 경로가 됩니다.
스프링 시큐리티의 의존성을 추가하고 서버를 재시작하면 로그인 페이지에 진입합니다.
Username의 기본값은 user입니다. Password는 서버 콘솔창에서 확인할 수 있습니다.
Using generated security password: a4b1274f-6c80-4dff-bd08-bc9dccf06617진입 시점부터 자동으로 session이 생성됩니다.
<html xmlns:th="http://www.thymeleaf.org"
      xmlns:sec="http://www.thymeleaf.org/extras/spring-security">

<div>
    <!--ROLE_USER 권한을 갖는다면 이 글이 보임-->
    <h1 sec:authorize="hasRole('ADMIN')">Has admin Role</h1>

    <!--ROLE_ADMIN 권한을 갖는다면 이 글이 보임-->
    <h1 sec:authorize="hasRole('USER')">Has user Role</h1>

    <div sec:authorize="isAuthenticated()">
        Only Authenticated user can see this Text
    </div>

    <!--인증시 사용된 객체에 대한 정보-->
    <b>Authenticated DTO:</b>
    <div sec:authentication="principal"></div>

    <!--인증시 사용된 객체의 Username (ID)-->
    <b>Authenticated username:</b>
    <div sec:authentication="name"></div>

    <!--객체의 권한-->
    <b>Authenticated user role:</b>
    <div sec:authentication="principal.authorities"></div>
</div>
이후 포스팅에서는 스프링시큐리티를 활용한 로그인 기능을 구현해보겠습니다.
Thymeleaf + Spring Security
Thymeleaf + Spring Security integration basics - Thymeleaf
Thymeleaf + Spring Security integration basics - Thymeleaf
Have you switched to Thymeleaf but your login and error pages are still using JSP? In this article we will see how to configure your Spring application to use Thymeleaf for login and error pages. All the code seen here comes from a working application. You
www.thymeleaf.org
'Spring' 카테고리의 다른 글
| [Spring Boot] JPA - MySql 연결 (0) | 2023.03.02 |
|---|---|
| [Spring Boot] ThymeLeaf 템플릿 사용 (0) | 2023.03.02 |
| [Spring Security] authorize가 인식 안되는 상황 (0) | 2023.03.02 |
| [Spring Boot] 스프링부트에서의 thymeleaf 사용방법 (1) | 2023.03.02 |
| [Srping Security] BCriptPasswordEncoder 해시 암호화 방법 (0) | 2023.03.02 |